Personal project · 3ds Max, V-Ray and Photoshop
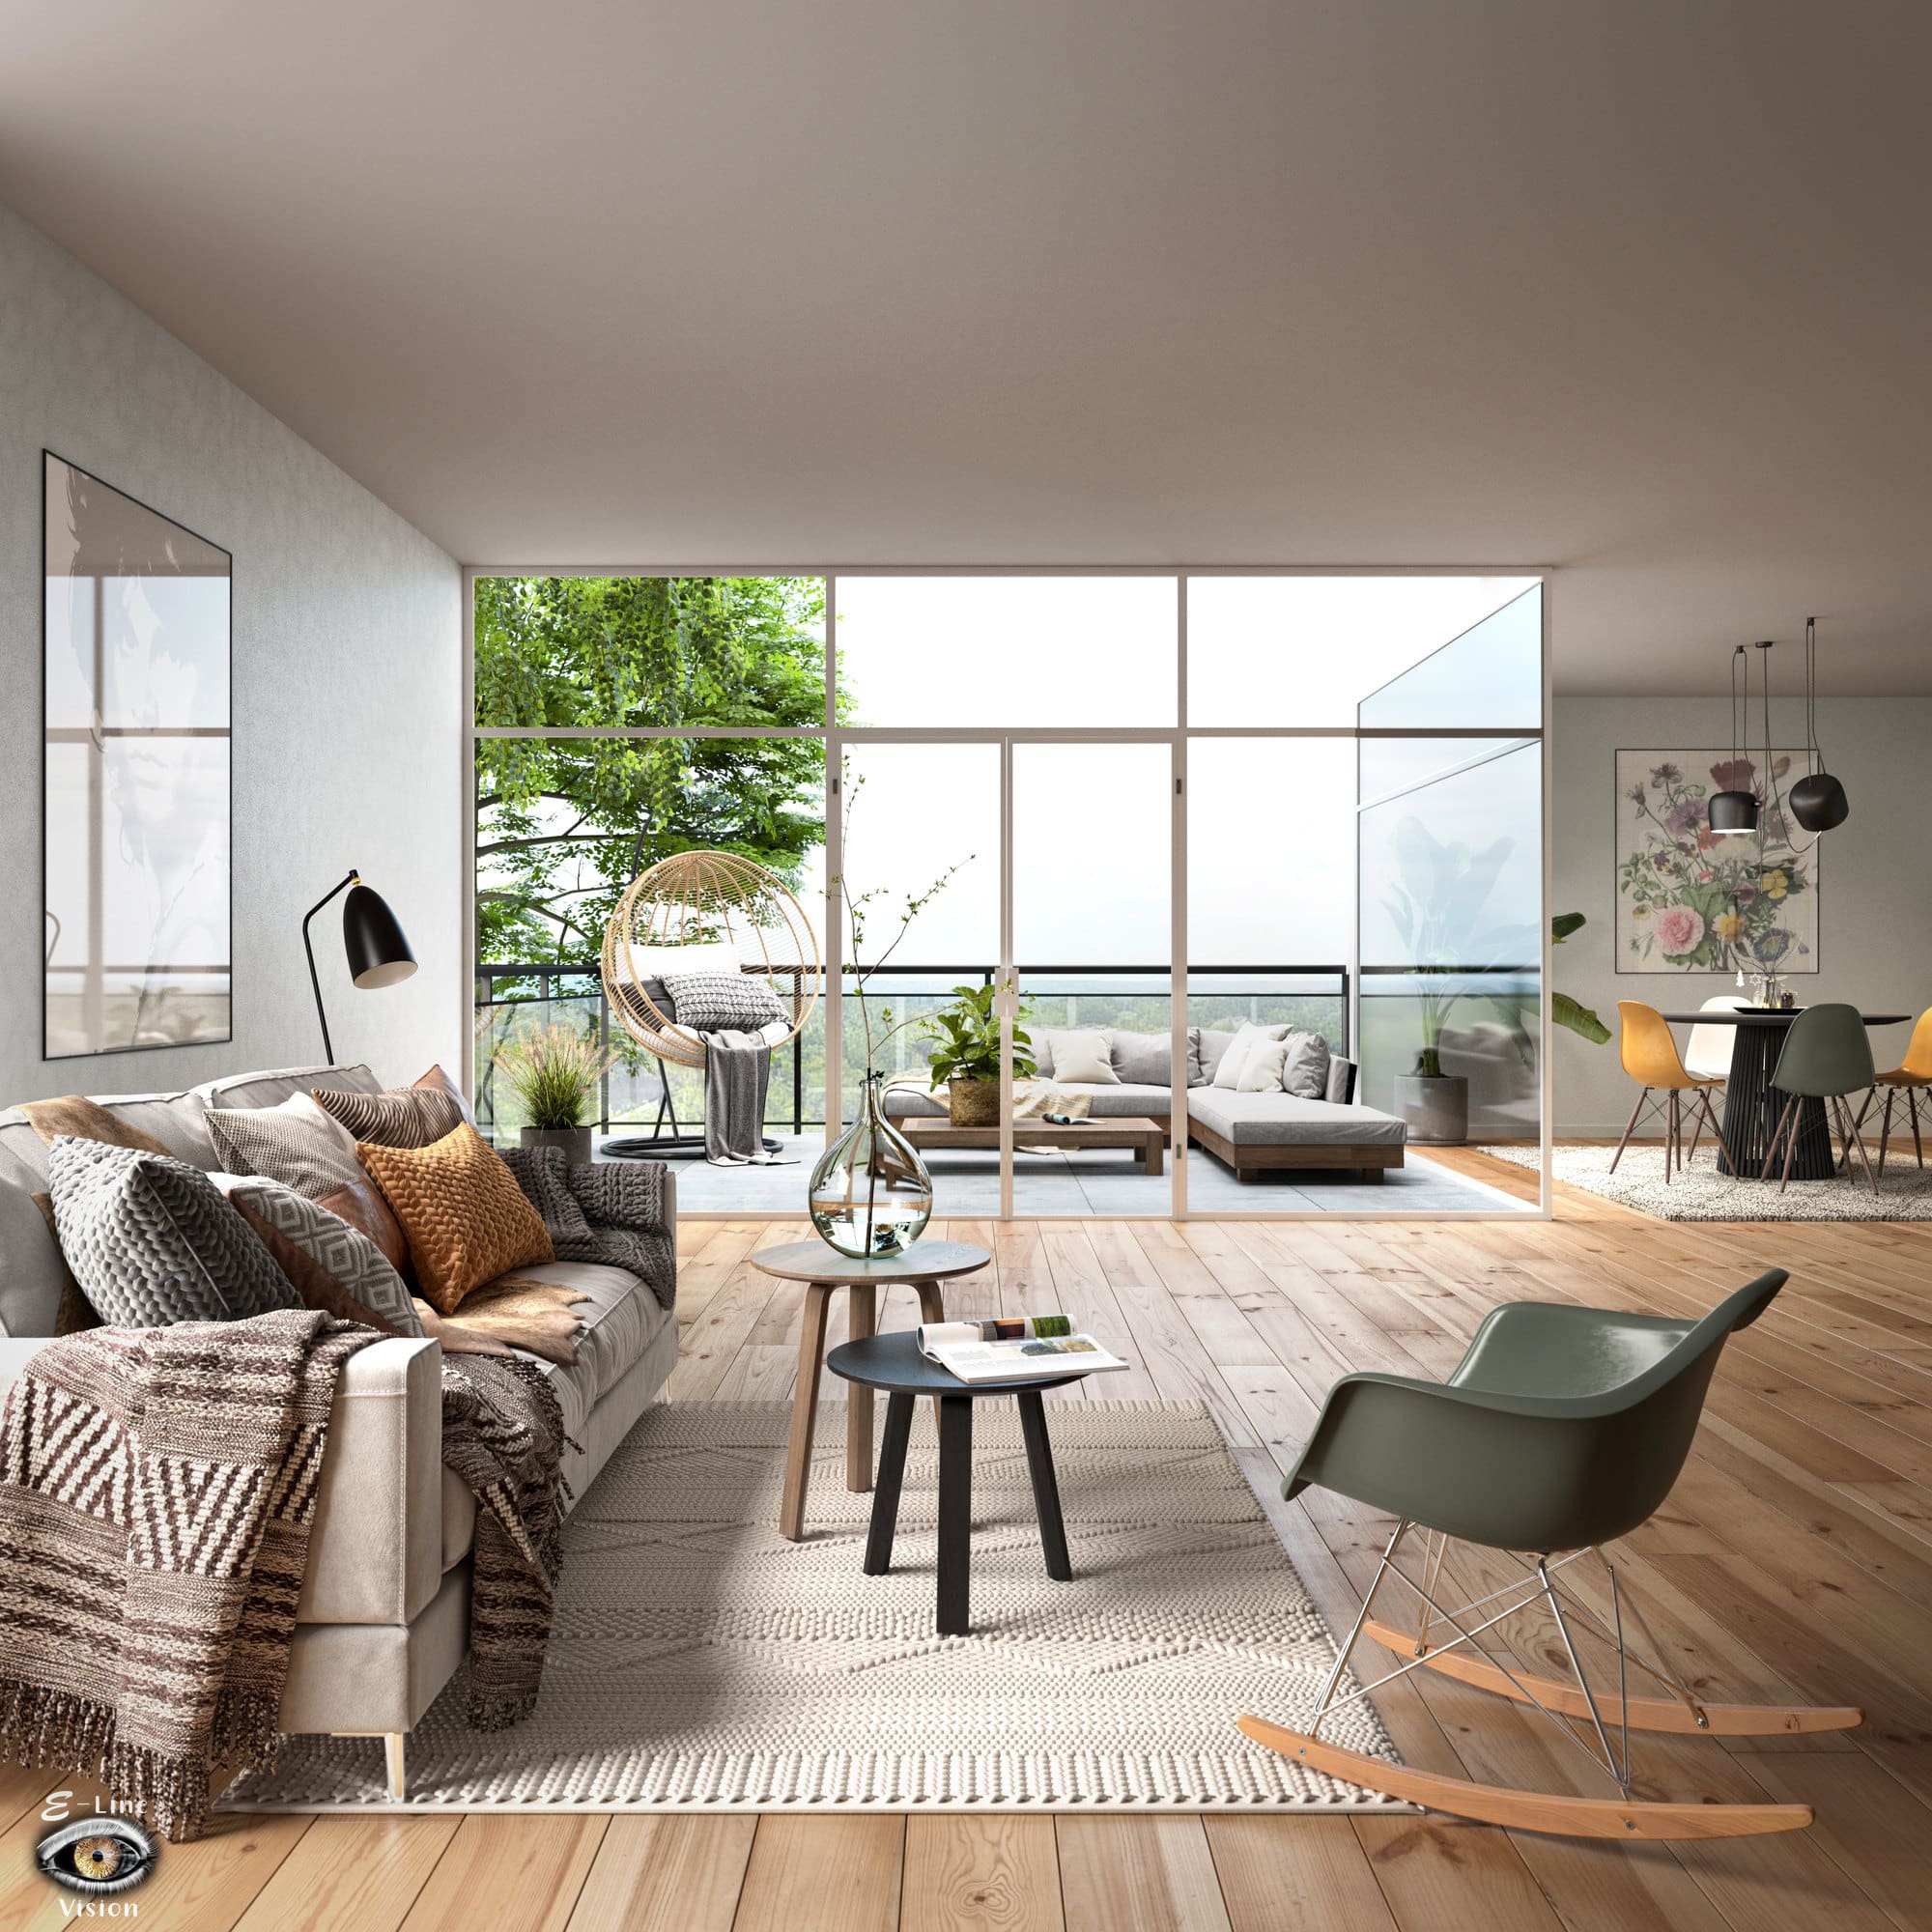
The Scandinavian Patio is a personal project: a light study and a portfolio piece. On this page, I show how an interior like this comes about: from the first piece of furniture to the render elements, and how I use them in Photoshop to get to the final image.
Furnishing a room in 3D works much like furnishing a real one. I started with the layout: the sofa faces the view, the rocking chair and two side tables form a cosy corner, and the rug holds it all together. Then I added the details that make a room feel lived in, like throws and cushions in natural tones, a glass vase with branches, and an open magazine.
The room changed a lot along the way. In the first version, the living room looked out on a closed courtyard. I replaced the small-paned doors with a large glass wall and turned the courtyard into a terrace with an open view. I also tried a wide camera that showed the kitchen and the TV wall, but in the end I chose a tighter frame, so the view and the seating area tell the story.
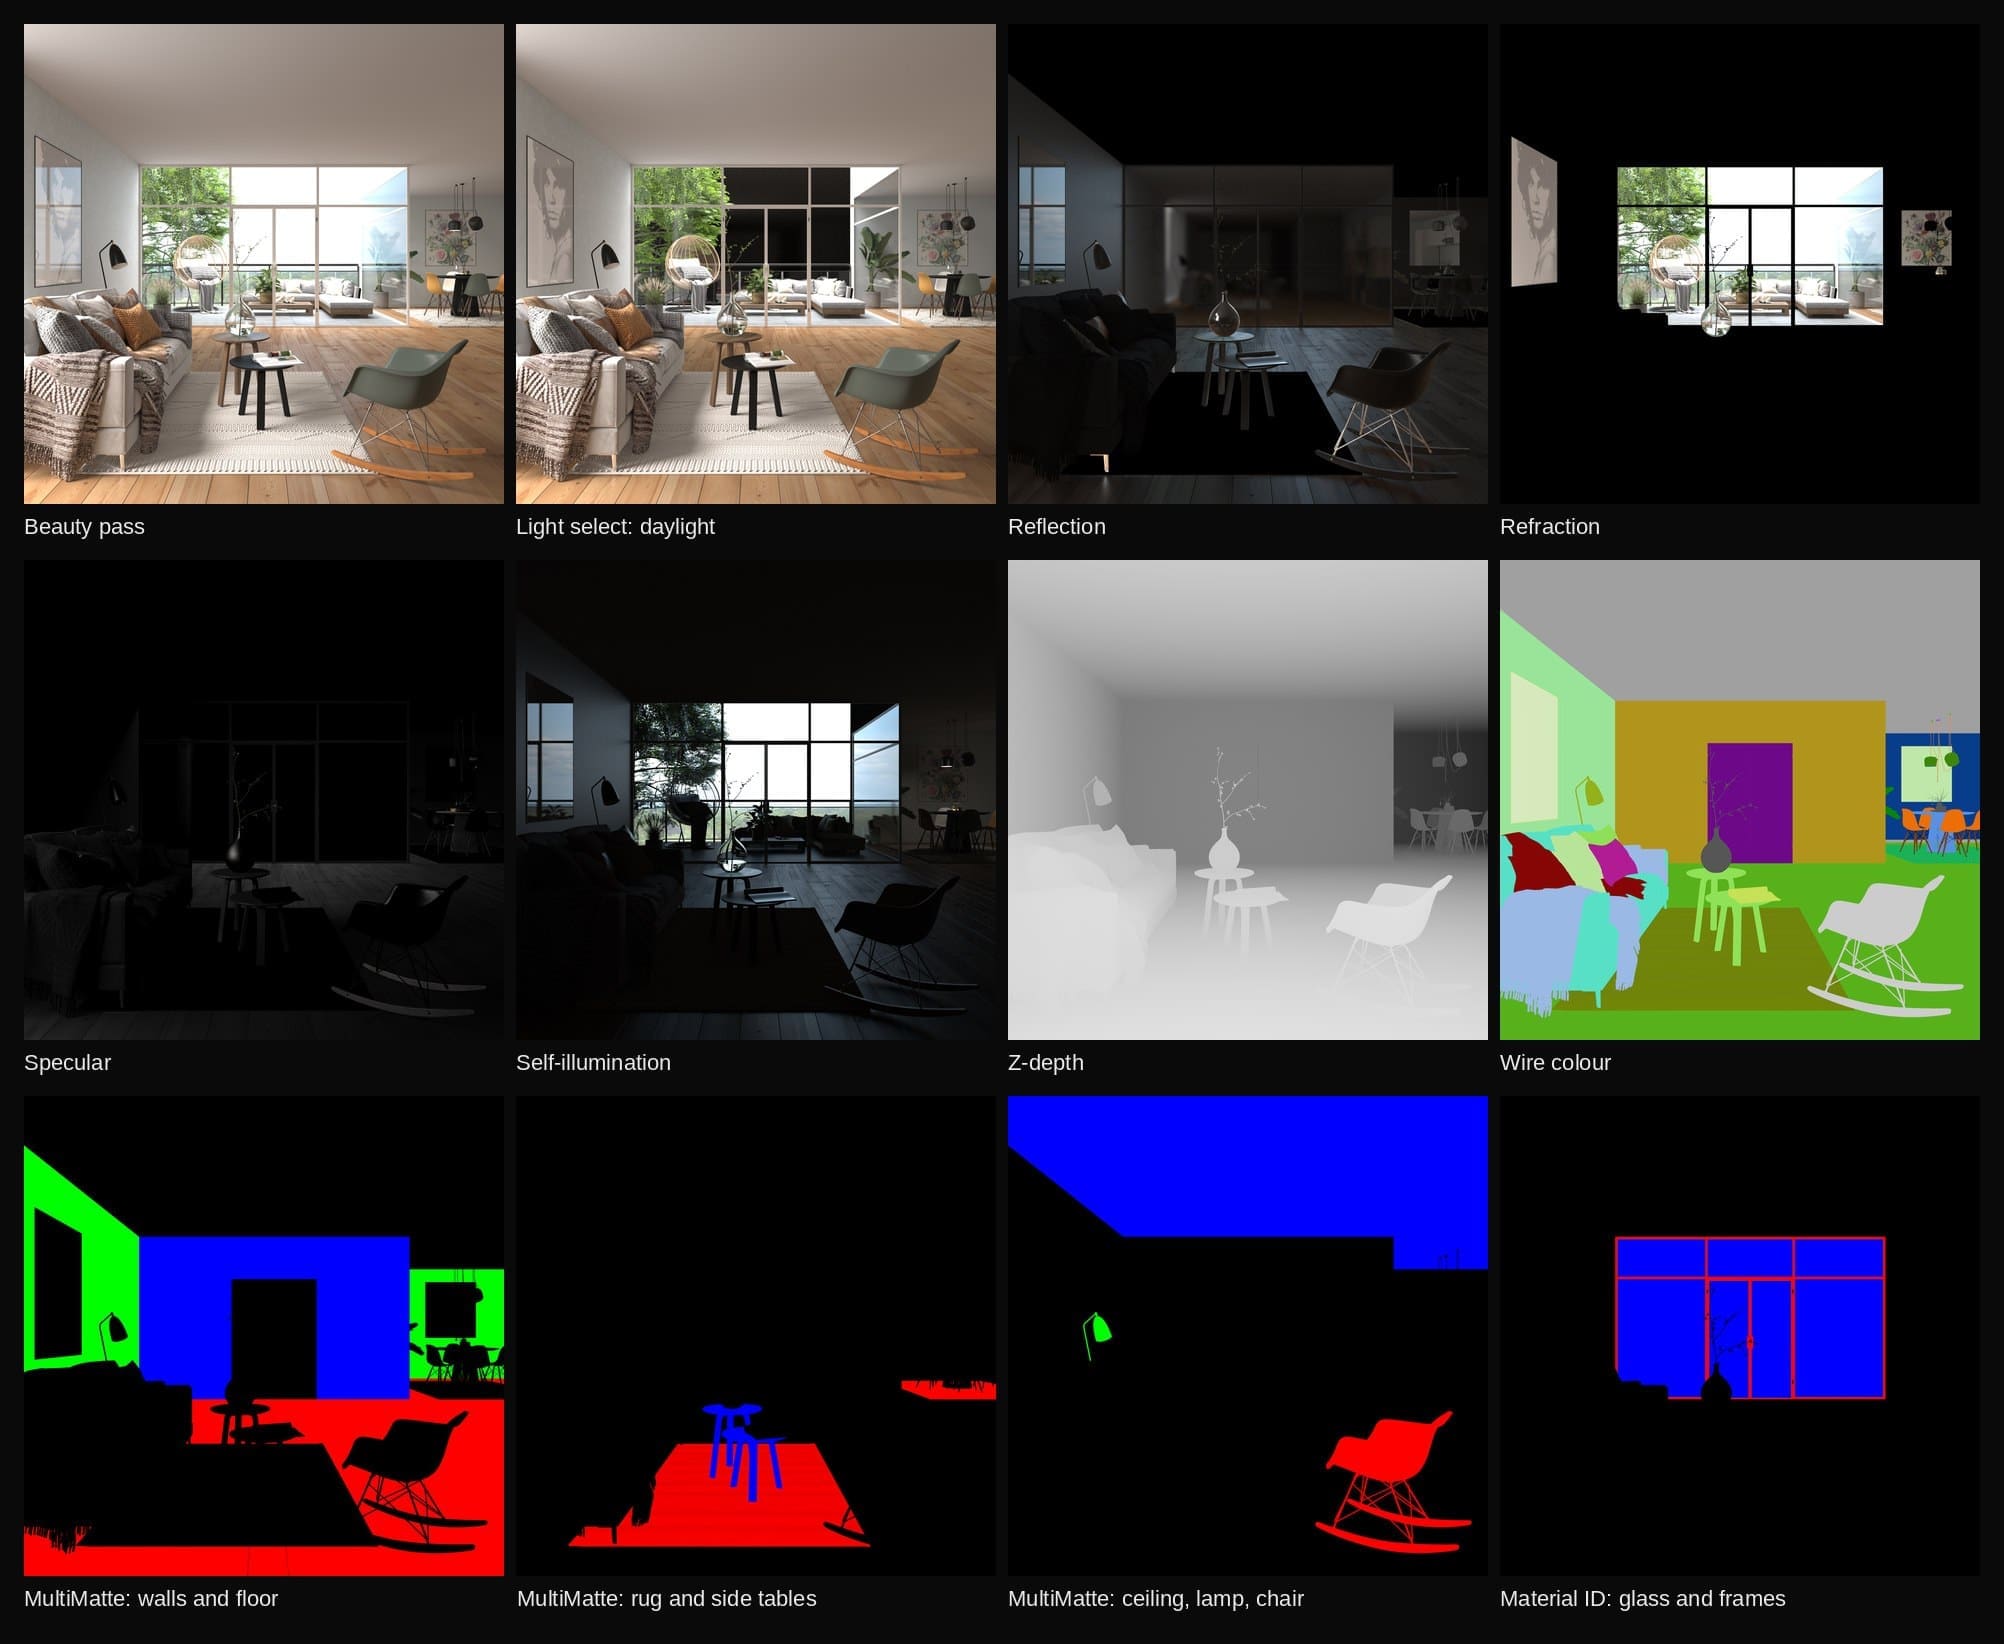
I rendered the image in V-Ray from 3ds Max. Besides the image itself, which is called the beauty pass, V-Ray saves a set of extra images: the render elements. Each element holds one part of the image. Some hold light, like the daylight that comes in through the windows. Others hold the reflections, the refractions and highlights, or the depth of the room. And some are masks: flat colours that let me select a wall, the floor, the glass or a single chair in one click.
In Photoshop, I bring these elements together, layer by layer. This is where the image really comes to life. The reflections make the glass of the poster and the shine on the chair and the floor look real. The refraction gives me control over everything you see through the glass: the terrace, the view and the vase. With the masks, I adjust the floor, the rug or the chair on their own, without touching the rest of the image. In the last step, I give the image its final colour, contrast and detail, until it feels like a bright Scandinavian morning.


Slide to compare the raw render with the final image.
Keeping it light without making it flat. A Scandinavian interior lives on daylight, white and light wood, but in a render, white quickly turns grey and dull. The challenge was to keep the room bright and airy, while the wood, the textiles and the glass keep their depth.
Do you have renders that need this final step? I also do post-production for other studios. I’d love to hear from you!
Next project: kitchen tiles in many colours →
E-Line Vision
Bringing vision to light.
I use cookies for statistics, the chat, YouTube videos and the spam protection of the contact form. This only happens if you give your consent. You can always change your choice via ‘Cookie settings’ at the bottom of the page.